I would like to begin by saying I feel obligated to tell you that the following procedures likely voided any warranties. Also, working with electricity is dangerous. Cutting metal is dangerous. The procedures and modifications I performed posed risks to my hardware and myself. If you decide to attempt building a 1U node, you do so at your own risk. Please use proper safety procedures and equipment.

Now that we’ve got that out of the way, let’s have some fun!
Could it be done?
The facts were in my favor. First, I’d seen some online so I knew it wasn’t impossible. Second, any parts and tools required are readily available. So, when Ben Wenger asked, “Can you build a 1U GPU Node for people who need to co-locate?”
Well…
I found some servers with GPUs online. These are professionally engineered systems and they exist thanks to fabricators, manufacturers, expensive test equipment and a profit margin.
Those are all incredible systems but exceed xx.network specs and in my personal opinion, are disconnected from the spirit of consumer hardware. I thought, “I should be able to MacGyver something a little closer to home and less costly."
So what would I need to pull this off?
- I’d need the parts.
- I’d need some tools.
- I’d need some creativity and resourcefulness.
- I’d need it to not melt onto the rack below.
After waiting 2 weeks for a PSU and a few days of building, the question is answered, “Yes!”
I built this with the average computer enthusiast in mind. If you’ve ever built a computer you’ve likely got most of the tools you need. If not, the tools I used are readily available in most tool aisles, local hardware stores or online.
Tools:
- Eye Protection
- Heavy Gloves
- Various Screwdrivers
- Tweezers
- Razor Knife
- Scissors
- Wire Cutters
- Linesman and Long Nose Pliers
- Straight Tin Snips (yellow grips)
- Felt-tip Marker
- Magnifying Glass
- Ruler
- Electric Drill and metal bits
- Hammer
Supplies and Parts:
- Band-aides
- Electrical Tape
- Loctite Repair Putty All-Purpose (rather than welding)
- Plastic for making screwhole and hardware templates (non-corrugated cardboard works well)
- Salvaged Parts (see the next paragraph.)
If you’re like me, over the years you’ve salvaged parts from your old computers. You’ve collected cables, screws, adapters, fans, brackets, drives, etc. Many of those parts can be broken down. You’re never going to use that SD Memory Card Reader or internal CD-ROM so get busy and have at them with the tin snips. The pieces from old computers can be repurposed for connecting fans, cable management, and mounting hardware.
The following are the hardware components I used. If you can’t get the same parts, the specs have the dimensions, so the list can at least act as a reference to help you determine what will fit.
- Processor: Ryzen 7 3700x
- Motherboard: PRIME A320I-K
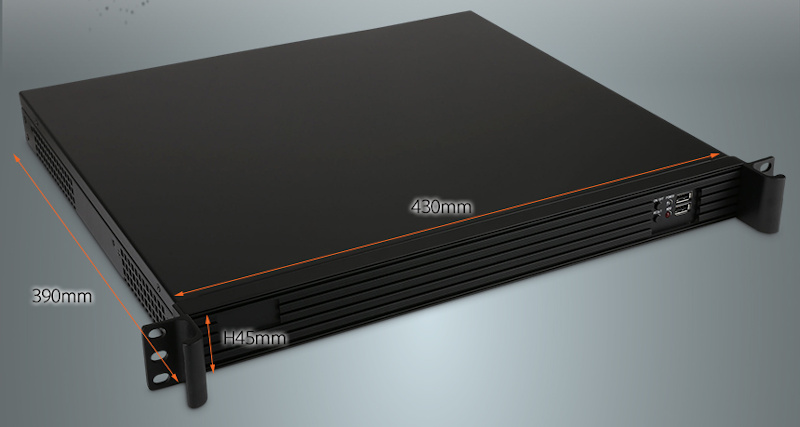
- Case: 2MONS 1U D390
- Memory: Samsung M378A1K43CB2-CTD x 2
- Storage: 860 EVO SATA III 2.5 inch 500 GB
- Graphics Card: Asus DUAL-RTX2070-8G-MINI
- PCIe Riser Cable: Phanteks FLATLINE 300mm/180
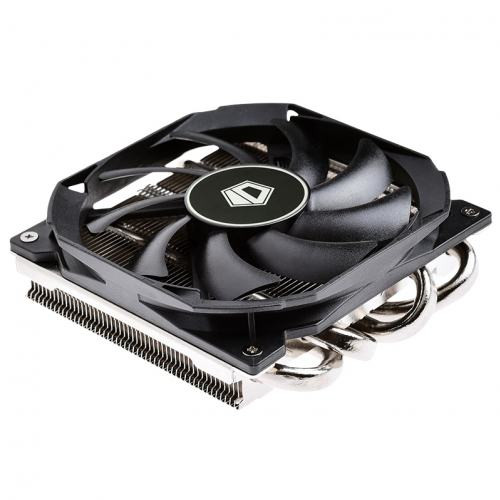
- CPU Cooler: ID-COOLING IS-30
- Power Supply: FSP Group 500W (FSP500-50FSPT)
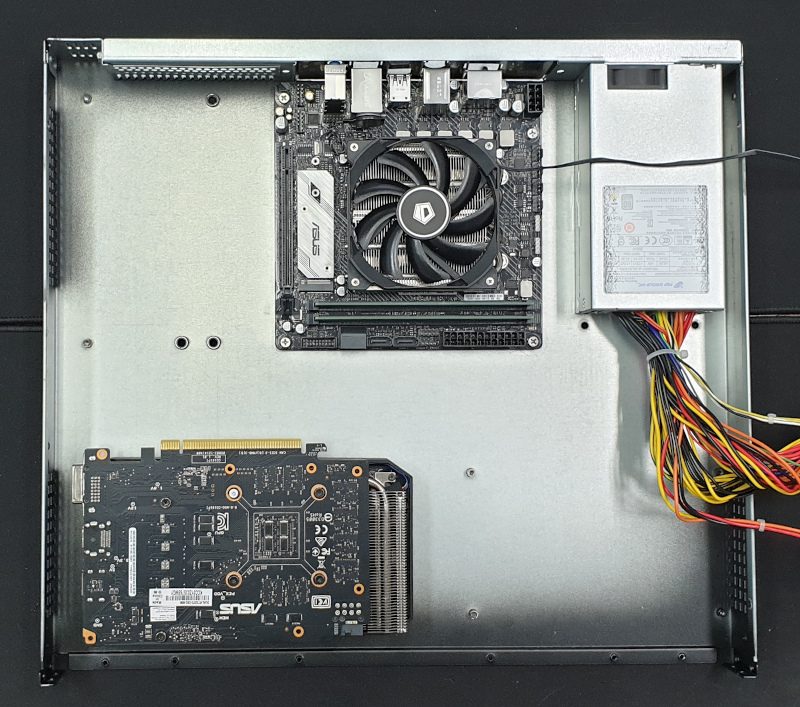
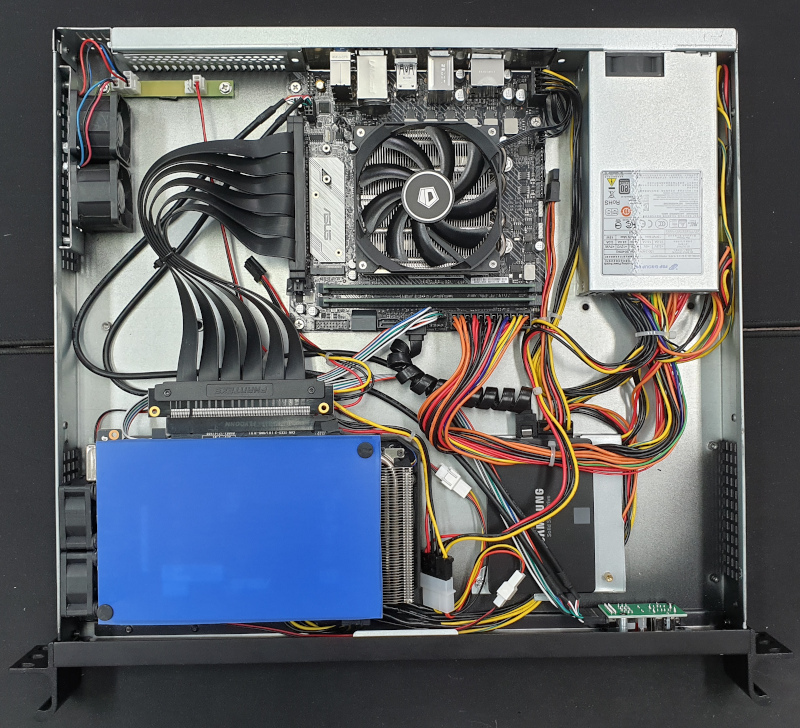
Most parts don’t just fall into place. Before I show you the assembly process, let me issue another disclaimer. I had to fit each part one by one, often finding something doesn’t quite fit or finding a better way to position it. I had to assemble, disassemble, and reassemble dozens of times to end up with what follows. I hope you like Tetris.
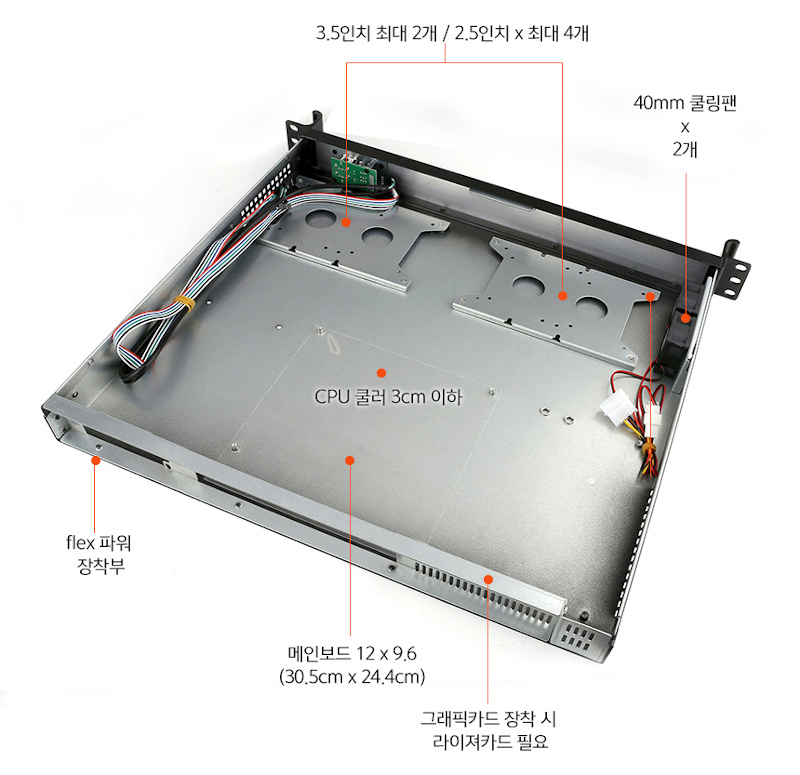
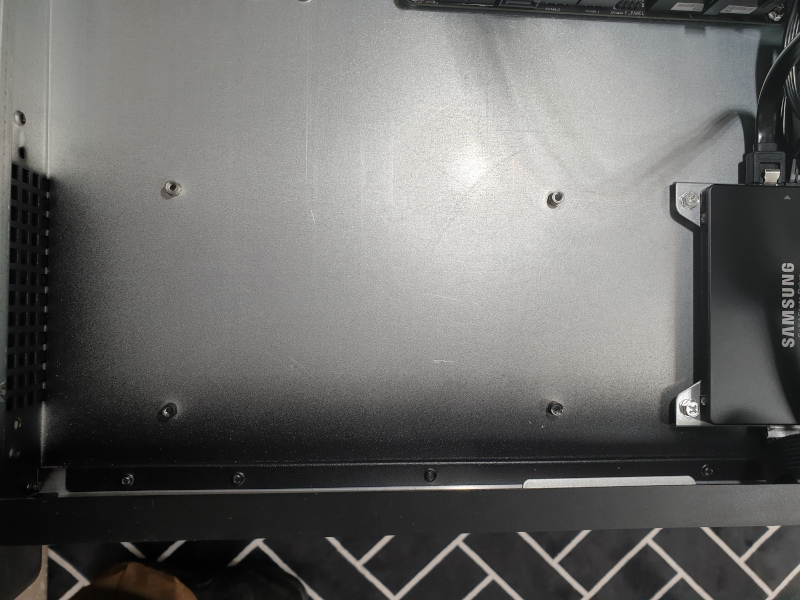
1U cases have specific dimensions but have various internal layouts just like consumer cases. Some have mounting bays, vents are in different spots, etc. but the feature you’re going to want most is the freedom to determine where things go.
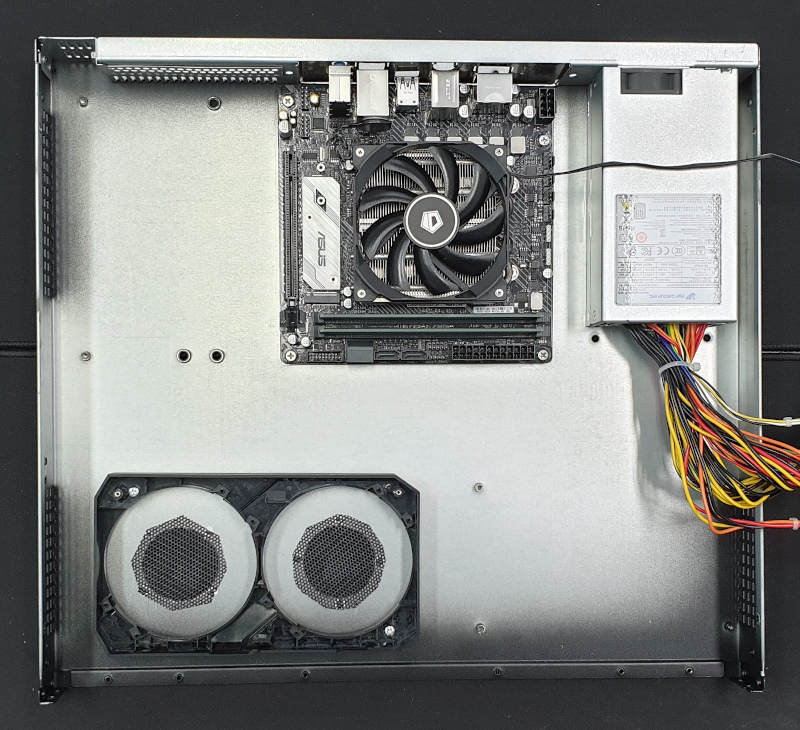
I bought this case specifically because of how bare it is. I removed anything that wasn’t welded or riveted to the chassis. The drive mount brackets and fan cluster are removable and I wasn’t sure where or even if I’d be using them. I left the USB/button cluster in because it will occupy that space but I did remove the entire front panel to make it easier to work. This allowed me to see which mount points were available before doing any modifications.
NOTE: Right in the middle of the image, CPU 3cm 쿨러 이하, just remember that. I’ll talk about that later.
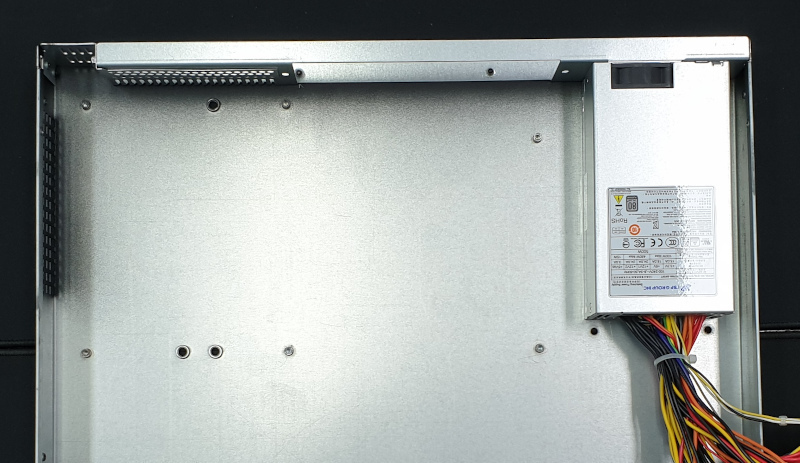
The PSU went in easily but I did need to make some changes to the wiring to accommodate the PCIe power for the graphics card. I originally thought I could use a 2 Molex to 8 pin PCIe Adapter but in the end, I chose to use the Molex for fans. I spliced a PCIe plug with one of the two PSU’s 8 pin CPU lines.
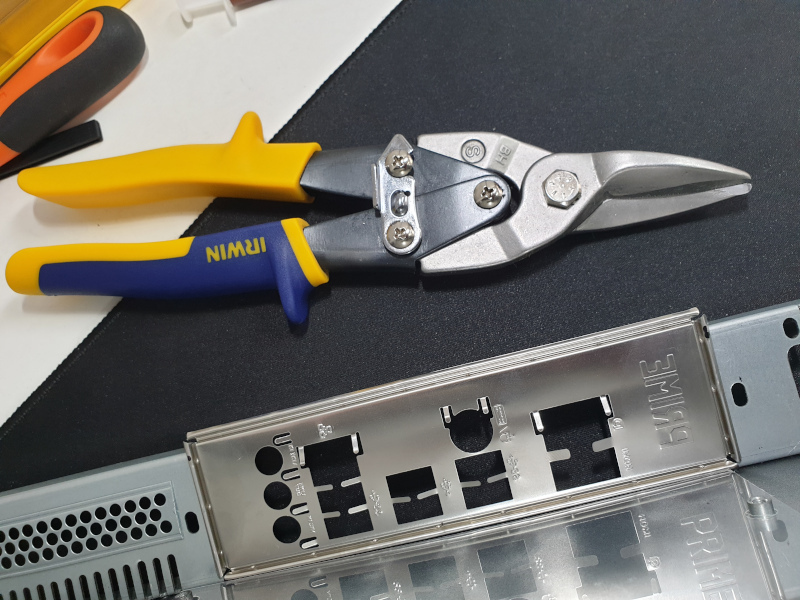
The motherboard has a dedicated spot but there were a few things that needed to be done before I could mount it into the case. The IO shield that came with the motherboard is not designed for 1U cases and needed to be cut down. I took care of that with tin snips and long nose pliers.
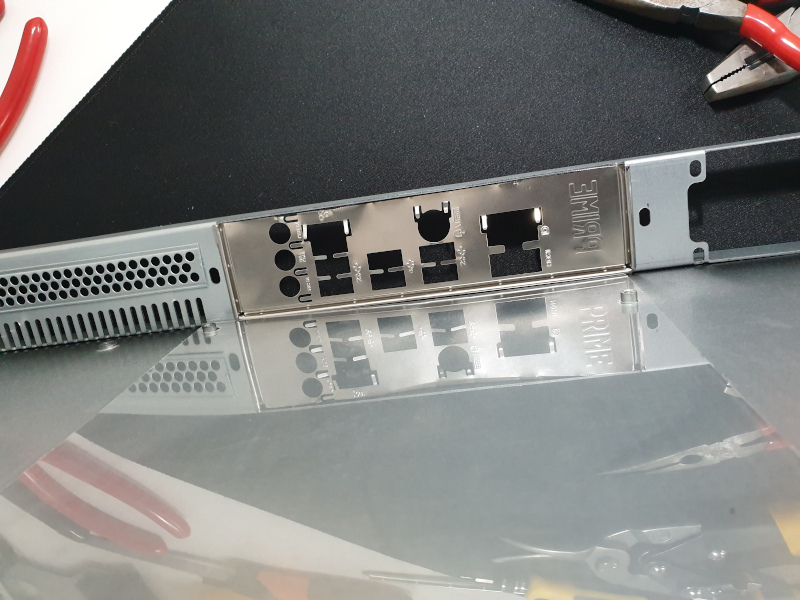
The case has mount posts for ITX, mATX and ATX motherboards just like consumer cases so no work was required to mount the motherboard. Remember CPU 3cm 쿨러 이하, that means, “3 cm or less CPU cooler”. Fortunately, I was able to find a 3cm heatsink/fan combination that ships with brackets for multiple socket sizes. There are low profile coolers for other socket sizes and they can be modified if you can’t find one for AM4 sockets. 3 cm or less AM4 solutions are limited and how you solve CPU cooling is going to be determined by what is available or how comfortable you are with fabrication or modification.
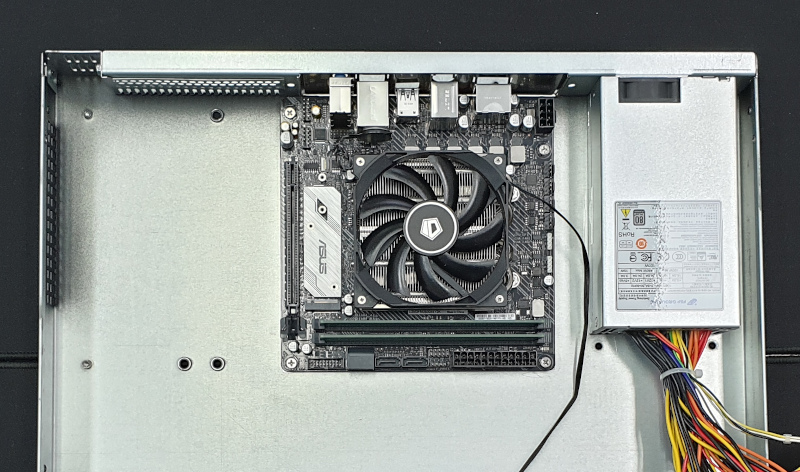
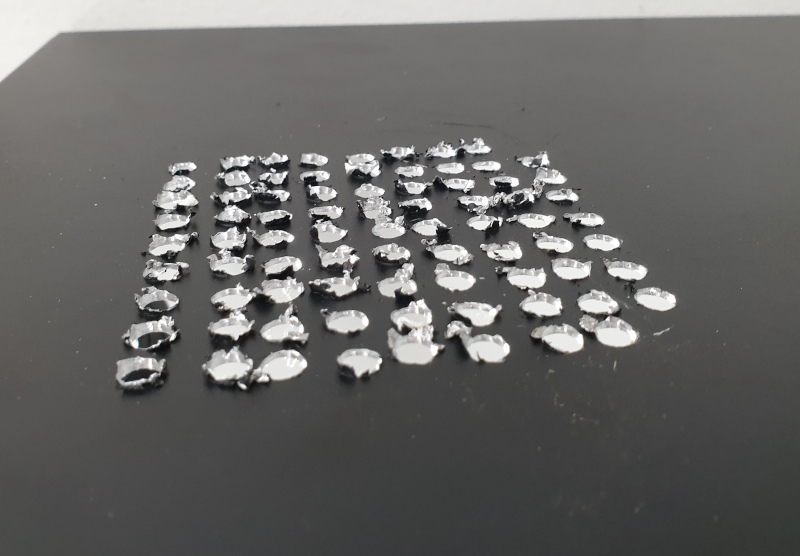
With the CPU cooler mounted to the board and the board mounted to the case, the entire height is 44mm. It fits but it didn’t leave any room for air flow so I drilled ventilation holes above the cooler. This was by far the most labor intensive step of the build.
There’s a reason it’s called a cheese grater. Be careful!
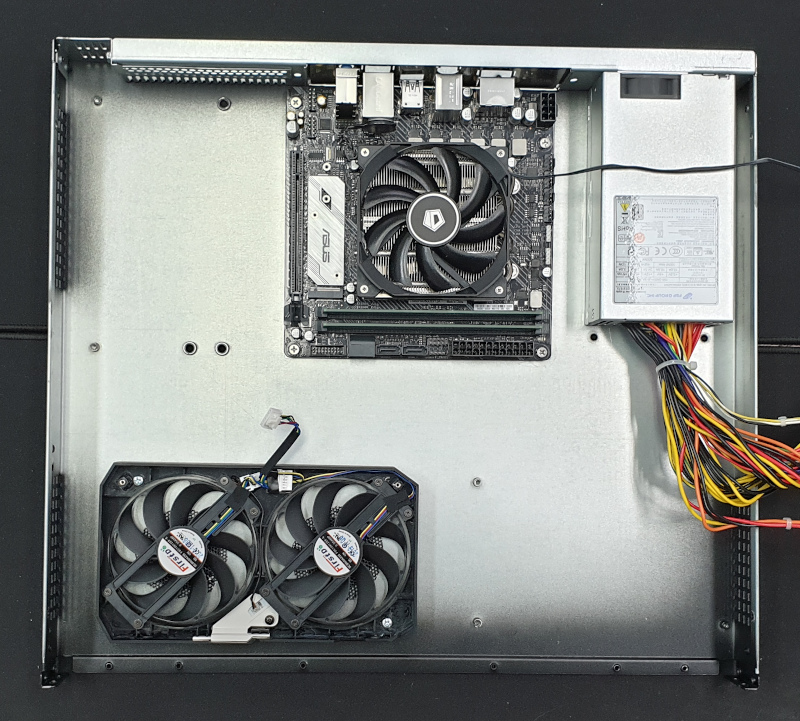
Here is the original location and orientation I chose for the GPU because of the mounting posts. I knew I could use at least one post and if I was lucky two would line up with the holes in the card. So with no modifications at all I tried. It turned out I would have to improvise a second point of contact to secure it in place.
Then I saw how close the fans would be to the cover and how much more drilling I would need to do. I had to find another way to have clearance over the fans.
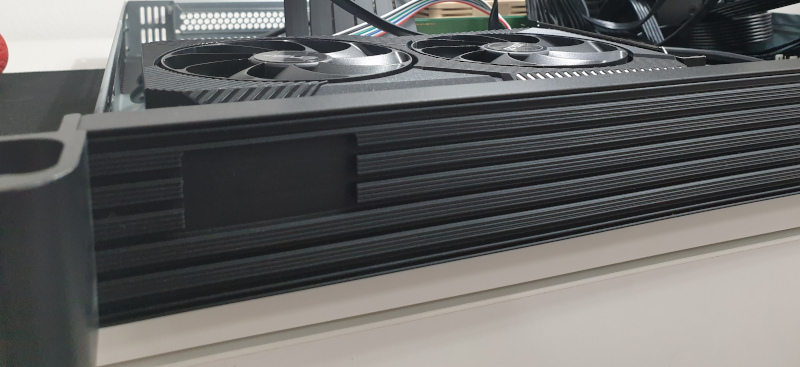
Or? Under the fans! If I flipped the card so that the fans point down, I would have 7mm of space provided by the posts which I could use to secure the card to the chassis under the fans.
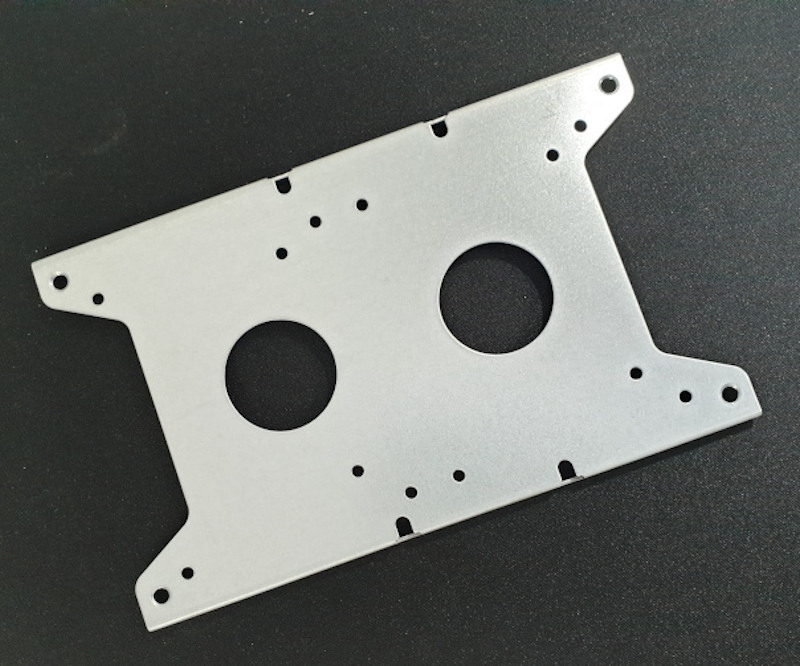
There were two storage mounting brackets supplied with the case and the screw holes already lined up perfectly with the case. I thought if I could use the mounting bracket as a template and drill holes through the fan shroud and I could use the shroud to secure the card to the case.
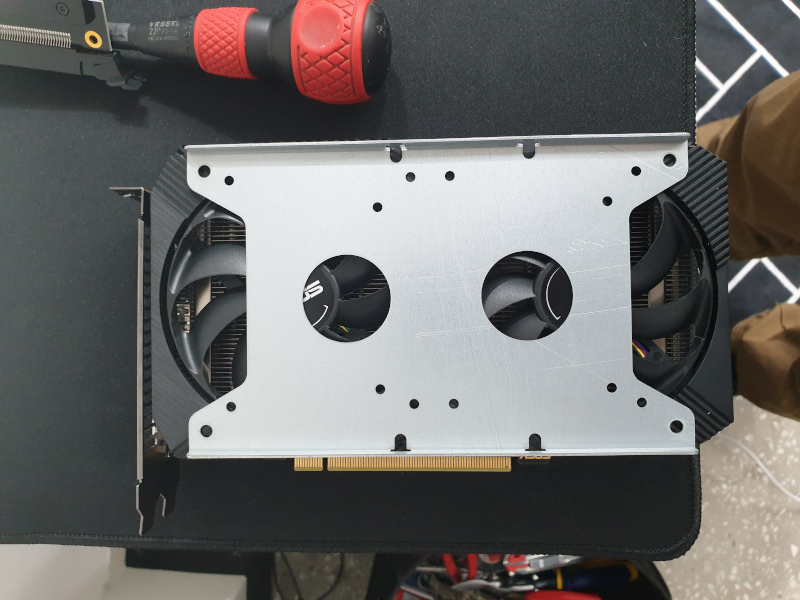
But before drilling I had to check to make sure there were no wires tucked inside the shroud where I wanted to drill. The heatsink and fan assembly come off by removing 6 screws and disconnecting one cable. The heatsink is attached to the shroud with 4 screws. The fans, another 5 screws. Disassembly was very easy and no special tools were required. I didn’t document the process but you can find disassembly videos or tutorials if you search for whatever card you’re using and ‘water block’. There was nothing obstructing the space I wanted to drill through so this turned out to be an easy solution for both fan clearance and a way to mount the card.
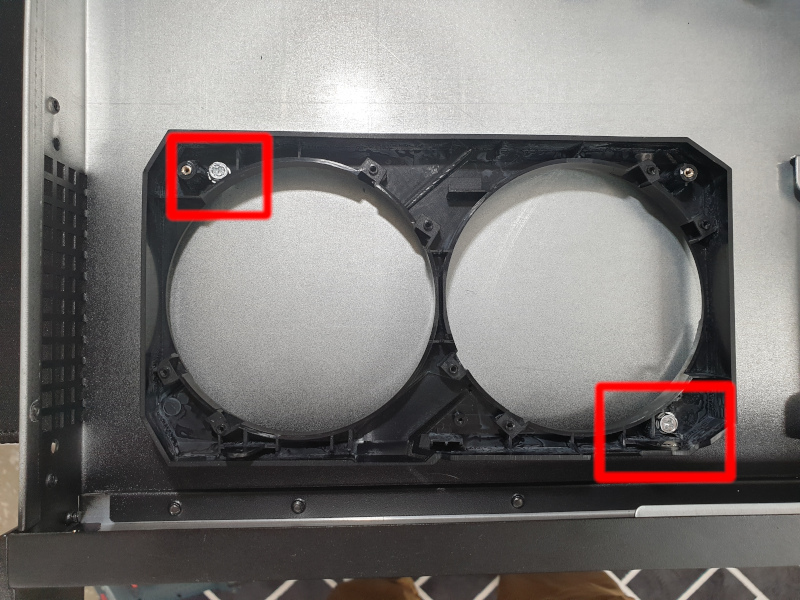
This is one of the many times when I had to undo everything to carry out a newly decided modification. Due to the orientation of the graphics card I cut two vents under each fan of the graphics card. I had some salvaged grill from another case I could use to cover the vents. I used a small amount of Loctite Putty to secure the grills to the case.

With ventilation taken care of I had to reassemble the card in the case.
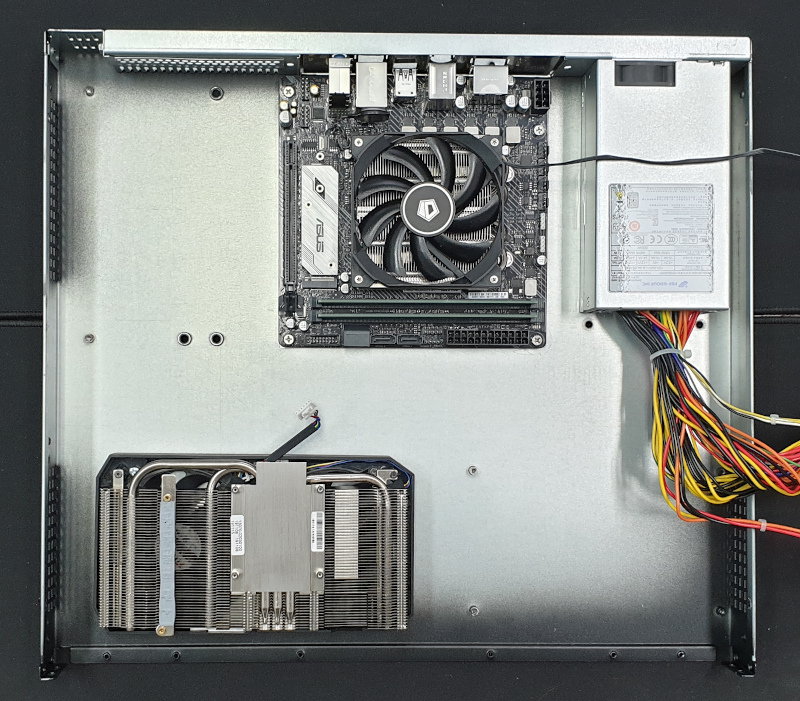
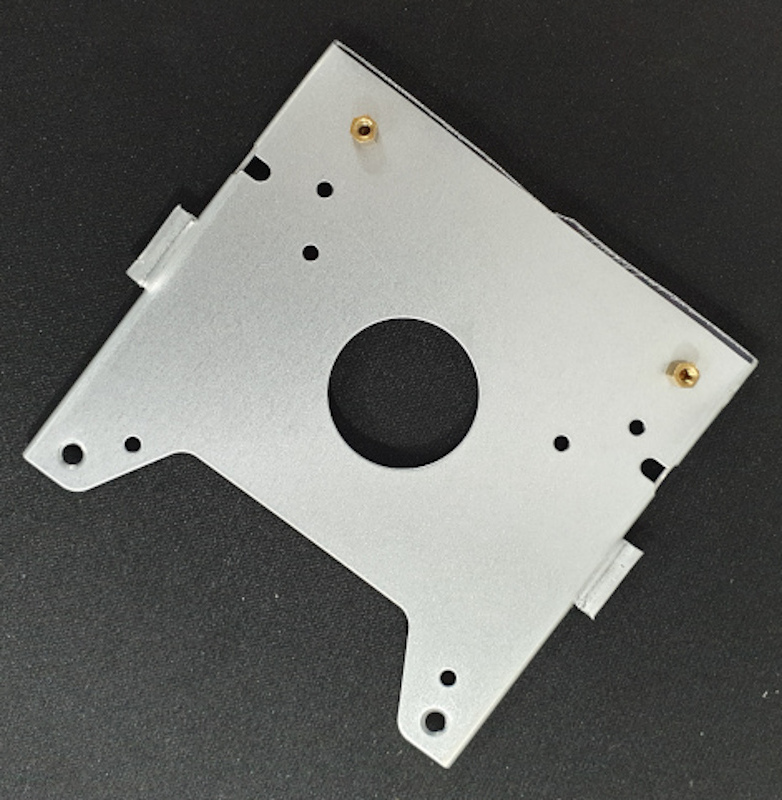
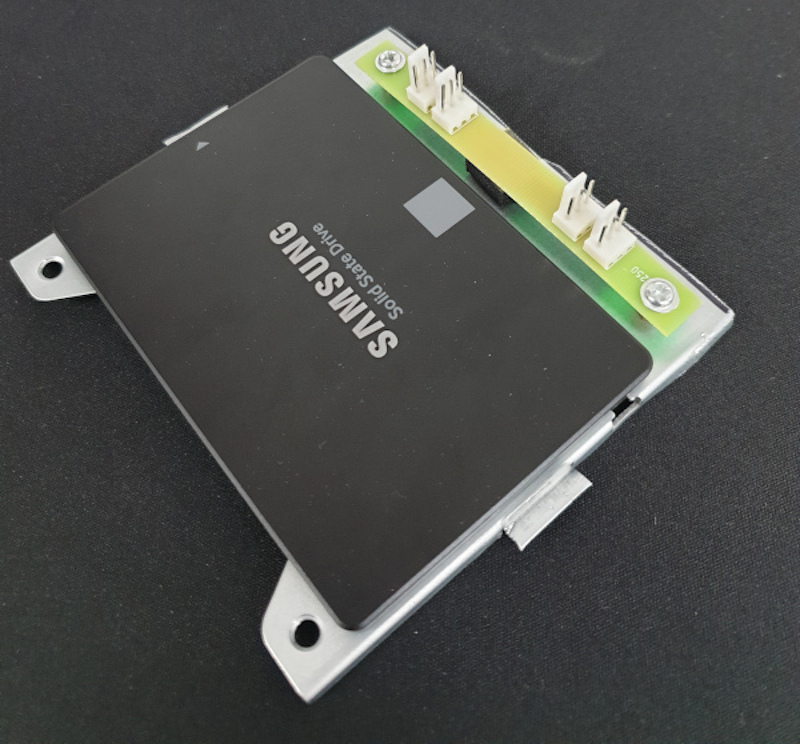
Most motherboards these days support NVMe and this step could be avoided but I had the SSD. So to mount the SSD, I used one of the provided brackets but it was larger than I needed.
Snip snip and add a couple of screw posts I had laying around. I also cut a space for the PCIe power line. I mounted the SSD and a salvaged power board for some fans, ran the wires underneath and screwed it in place.

And for the final touches. You’ll notice I moved the power board that was next to the SSD to another location. The two fans to the left of the graphics cards are pulling air into the case. The two fans to the left of the motherboard are pushing air out. I organized the cables by rolling the SATA cable, using zip ties to shape the PCIe riser cable and tucked all the extra length here and there. I placed a thin sheet of plastic over the graphics card to ensure the back of the card didn’t short on the case cover. This is what it looked like before I closed it for the last time. I hope it’s the last time!
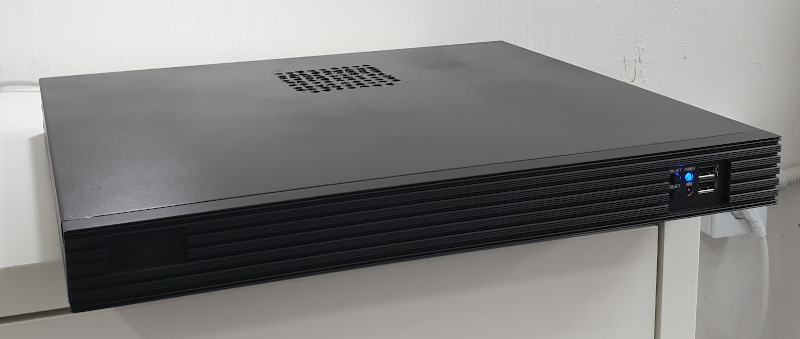
With the final adjustments made, I closed it.
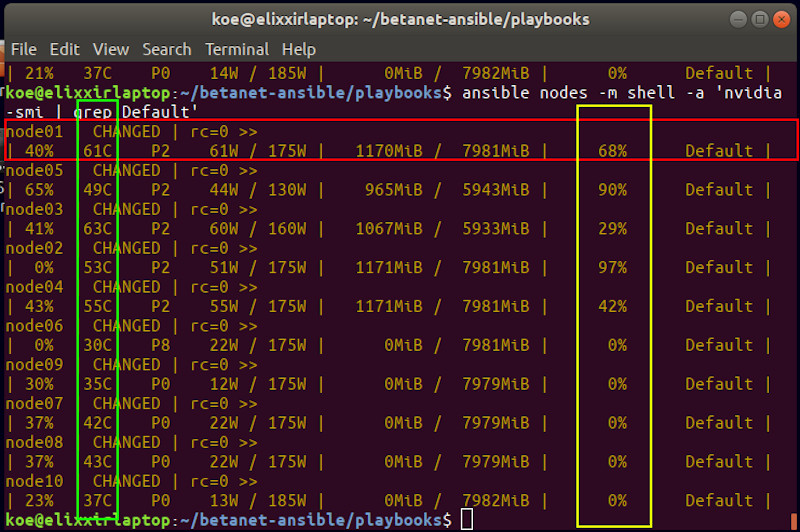
My primary concern was the temperature of the GPU. Below shows the results from nvidia-smi for all 10 nodes in the NodeLab. The temperature in the NodeLab is 25C. node01 is in the closed 1U case. node02 - node10 are in open towers. The yellow outline shows node01 - node05 are running rounds on the GPU. node06 - node10 are idle. The green outline shows the temperatures of the GPUs. I’m very pleased!
There is more that I could have done. I had to rush some of the burr removal, I could add more fans or reposition them and I could have organized the cables even more but most of that is superficial and node01 needs to get back to work.
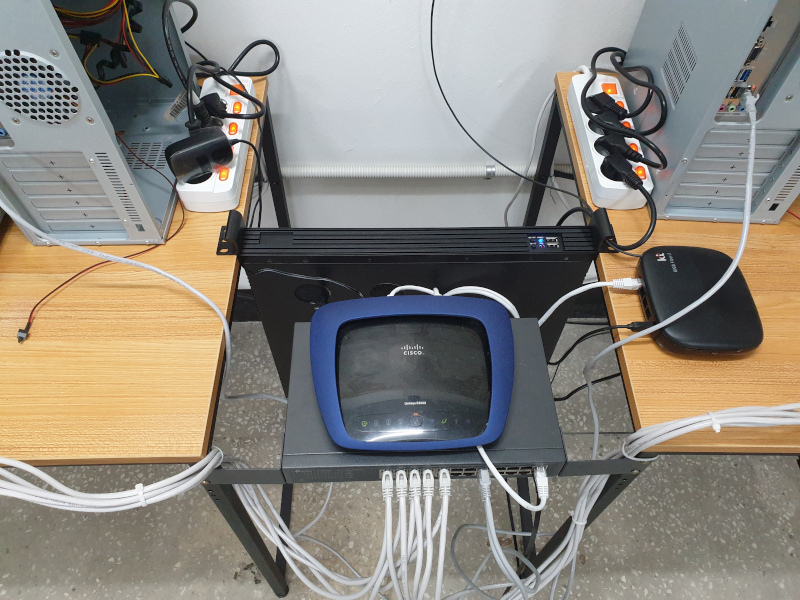
Node01 is now a 1U BetaNode and back online with the rest of the nodes.
Some final thoughts…
- A graphics card with a blower rather than fans might be a better option.
- A drill press for drilling ventilation holes is likely easier, faster and more accurate.
- Removing the burrs from a drill hole requires much more time than drilling the hole.
- Refrain from fully mounting anything until the end. If something has 4 screws, only use 1 because you’ll likely have to remove that part again, and again, and again.
- Temperatures didn’t get nearly as high as I expected.
- Make sure you add the size of the riser card’s connectors to the graphics card. The cable is flexible but the connectors are not.
If you decide to build a 1U BetaNode, I wish you the best of luck and please be safe! If you’ve got any questions, feel free to ask.


